
Metal cladding, often known for its durability and protective role in architecture, is now stepping into the spotlight of artistic expression. The question on many minds: Can you paint metal cladding? This article is your guide to unravelling the potential and simplicity behind transforming the functional into the visually striking. Whether you’re an architect aiming for a stylish blend of form and function or an art enthusiast seeking a new canvas, the world of painted metal cladding invites you to explore the exciting intersection of practicality and creativity. Join us as we break down the barriers between utility and artistry, inviting you to reimagine architectural design possibilities.
What Metal Claddings Can Be Painted?
The ability to paint metal claddings largely depends on the type of metal and its surface treatment. Here’s a brief overview of commonly used metal claddings and their paintability:
Steel Cladding:
Paintable: Yes, steel cladding is often paintable. It’s crucial to properly clean and prepare the surface before applying paint to ensure adhesion.
Aluminum Cladding:
Paintable: Yes, aluminum cladding can be painted. However, it’s essential to use the right type of paint and adhere to proper surface preparation for optimal results.
Copper Cladding:
Paintable: Generally, copper cladding is not painted because it develops a natural patina over time, which is often valued for its aesthetic appeal. Painting may interfere with this process.
Zinc Cladding:
Paintable: Zinc cladding is not typically painted. Like copper, it develops a protective patina that is appreciated for its unique appearance.
Stainless Steel Cladding:
Paintable: While stainless steel can be painted, it is rare. Stainless steel is often chosen for its corrosion resistance and sleek appearance, and painting may compromise these qualities.
Galvanized Steel Cladding:
Paintable: Galvanized steel can be painted, but proper surface preparation is crucial. The zinc coating on galvanized steel must be primed before applying paint.
Tools to Paint Metal Cladding
Painting metal cladding requires careful preparation and the right tools to ensure a smooth and durable finish. Here’s a list of tools you might need:
Safety Gear:
- Safety goggles
- Gloves
- Respirator mask (especially if working in an enclosed space or using spray paint)
Surface Preparation Tools:
- Wire brush or wire wheel: Remove rust, loose paint, and other surface contaminants.
- Sandpaper or sanding block: To smooth the surface and promote paint adhesion.
- Sanding sponge: Useful for reaching irregular surfaces.
Cleaning Tools:
- Mild detergent or degreaser: To clean the metal surface thoroughly.
- Rags or sponges: For applying cleaning solutions and wiping down surfaces.
Priming Tools:
- Metal primer: Choose a primer specifically designed for the metal you are painting.
- Paintbrush or spray gun: Depending on the size of the metal cladding panels and personal preference.
Painting Tools:
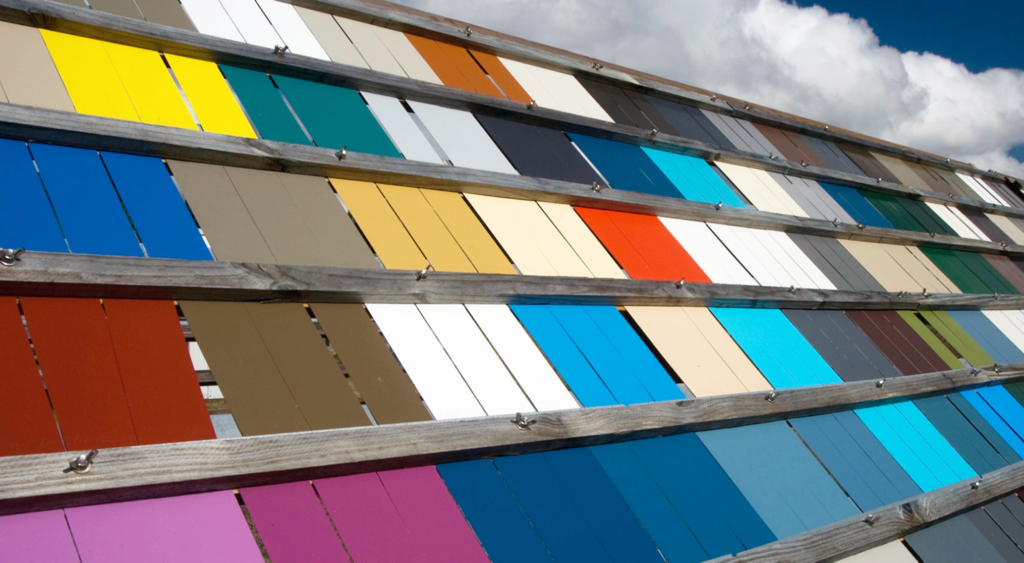
- High-quality paint: Choose a paint suitable for the metal type and the environment (indoor or outdoor).
- Paintbrushes or paint sprayer: Brushes for detailed work and a sprayer for larger surfaces.
- Paint trays and liners: For brush application.
Finishing Tools:
- Clear coat (optional): For added protection and to enhance the paint job’s longevity.
- Fine-grit sandpaper: For smoothing the painted surface between coats, if necessary.
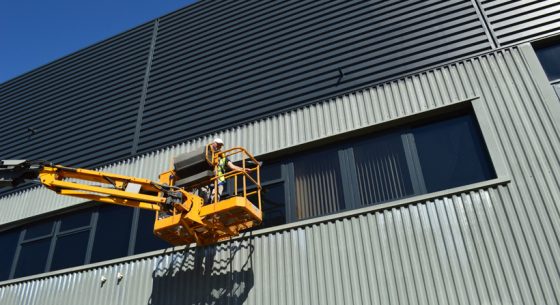
Ladder or Scaffolding:
- Depending on the height of the metal cladding, you may need a ladder or scaffolding to reach all areas safely.
Painter’s Tape:
- Use painter’s tape to mask off areas of the cladding you don’t want to paint, ensuring clean lines and edges.
Mixing Sticks and Buckets:
- Stirring paint and primer thoroughly before application.
Painter’s Rags or Paper Towels:
- For wiping off excess paint and cleaning up spills.
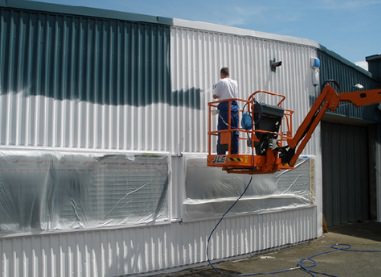
The Process of Painting Metal Claddings
1. Safety First:
Before starting painting metal claddings, make sure you have the right safety gear on. This involves wearing safety goggles to safeguard your eyes from debris, gloves for hand protection, and a respirator mask if you are working in a confined space or using paint with potent fumes.
2. Surface Inspection:
Examine the metal cladding closely. Look for rust, peeling paint, or any other surface irregularities. Address these issues before proceeding with the painting process.
3. Cleaning:
Effectively clean the metal surface by utilizing a mild detergent or degreaser. Apply the cleaning solution with a sponge or cloth, diligently removing dirt and grime. Rinse the surface with water and confirm thorough drying before you paint metal claddings.
4. Surface Preparation:
Utilize a wire brush or wire wheel to eliminate rust and peeling paint. Be particularly attentive to corners and crevices where rust could accumulate.
Sand the entire surface with medium to fine-grit sandpaper.
This stage is essential to generate a mildly textured surface that enhances paint adhesion. Following the sanding process, use a clean, damp cloth to wipe away any residual dust from the surface.
5. Priming:
Choose a metal primer that is compatible with the type of metal you are painting. Apply the primer evenly using a paintbrush or a spray gun.
6. Sanding (Optional):
Once the primer has fully dried, you have the option to lightly sand the surface with fine-grit sandpaper, enhancing the smoothness of the finish. While this step is discretionary, it can contribute to achieving a more refined end result.
7. Taping (Optional):
If you need to protect certain areas from paint, use painter’s tape to mask off windows, trim, or any adjacent surfaces. This step helps achieve clean lines and edges.
8. Painting:
Thoroughly mix the paint before application to guarantee a uniform color and texture.
Use a high-quality paintbrush for smaller areas or detailed work. For larger surfaces, consider using a paint sprayer for a more even and efficient application.
Paint metal claddings in long, smooth strokes, following the natural lines of the metal cladding.
Ensure that each coat is fully dried before adding subsequent layers. Adhere to the recommended drying times provided by the paint manufacturer.
9. Finishing (Optional):
If desired, apply a clear coat after the final coat of paint has dried. This clear coat provides an additional layer of protection and enhances the durability of the paint job.
10. Clean-Up:
Clean your tools promptly after use. Dispose of any waste materials, such as used rags or empty paint cans, in accordance with local regulations.